How to install a new faucet without damaging pipes
A practical Southlake guide to swapping a faucet without cracking supply lines, stripping threads, or turning a weekend project into an emergency.
You install a new faucet without damaging pipes by shutting off the water first, supporting the supply lines while you loosen the old connections, and never forcing a fitting that has seized. The damage almost never happens at the faucet itself - it happens six inches below the deck, where old shutoff valves and brittle supply tubes meet a wrench. Do those three things in order and a standard kitchen or bath swap stays a two-hour job instead of a pipe repair.
This guide walks through the full process the way we run it on service calls across Southlake, from the tools that actually matter to the 2026 pricing you should expect if you hand it off. We'll also cover the mistakes that crack copper and split braided lines, because those are the ones that cost real money.
Why faucet installs damage pipes in the first place
Faucet installation is a plumbing task that replaces an existing fixture and reconnects it to the home's water supply, and the risk is concentrated in the connections you can't see from above the counter. Most Southlake homes were built between the 1980s and the 2010s, which means the faucet might be three years old while the shutoff valves underneath are original. Those valves have been sitting in one position for two decades.
The moment you turn a stiff angle stop, you're asking a 20-year-old rubber washer and a brass seat to move for the first time. If it doesn't seat again, you get a slow drip that runs down the cabinet wall. If the valve body cracks, you get a full-pressure spray and you're reaching for the main. Same story with the supply line: braided stainless has a rubber inner tube that hardens, and copper risers work-harden every time they're bent.
There's also the torque problem. Faucet nuts are usually tightened to about 15 to 20 inch-pounds - firm hand-tight plus a quarter turn. Homeowners who lean on a basin wrench with their whole body end up twisting the entire supply stub, which can crack the solder joint inside the wall. That's the failure that turns a $200 faucet into a $1,400 pipe repair southlake TX call.
One more local factor: Southlake water runs hard, typically in the 8 to 12 grains-per-gallon range depending on which side of town you're on. Hard water leaves mineral scale inside valve bodies and on threaded connections, and scale is what makes a fitting feel welded shut when it isn't.
What tools do I need to install a faucet in Southlake?
You need a basin wrench, an adjustable wrench, a bucket and towels, plumber's tape, a headlamp, and a phone to photograph the old setup before you touch anything. Everything else is optional.
The basin wrench is the one tool people try to skip, and it's the one that saves the job. Faucet mounting nuts sit behind the sink bowl at an angle no standard wrench can reach. A $20 basin wrench gets you a clean grip without knuckle damage or rounded nuts.
Here's the short list we'd hand a homeowner:
- Basin wrench - for the mounting nuts under the sink
- Adjustable wrench - 10-inch is the right size for supply connections
- Bucket, rags, and a shallow pan - you will spill water, plan for it
- PTFE thread tape - two to three wraps clockwise on threaded fittings
- Headlamp - cabinet interiors are dark and you need both hands
- Penetrating oil - apply to corroded shutoff valves 15 minutes before you touch them
- New supply lines - buy them before you start, not after one splits
If your shutoff valves are the older multi-turn style and they feel gritty, pick up two quarter-turn ball valves while you're at the store. They're about $12 each and they turn the riskiest part of the job into a five-minute swap.
Step-by-step: installing a faucet without wrecking the supply lines
Work in this order and the pipes stay intact. Skip a step and you're gambling on 20-year-old rubber.
1. Shut off the water and drain the lines
Close both angle stops under the sink, then open the faucet to release pressure. If the stops won't close fully or they snap when you turn them, stop there and shut off at the main. A valve that won't seal is a valve that will flood your cabinet the second you disconnect the supply line.
2. Photograph everything before you loosen anything
Two photos - one of the supply connections, one of the drain assembly. Reassembly goes three times faster when you can see how the hot and cold lines were routed.
3. Disconnect the supply lines from the faucet, not the wall
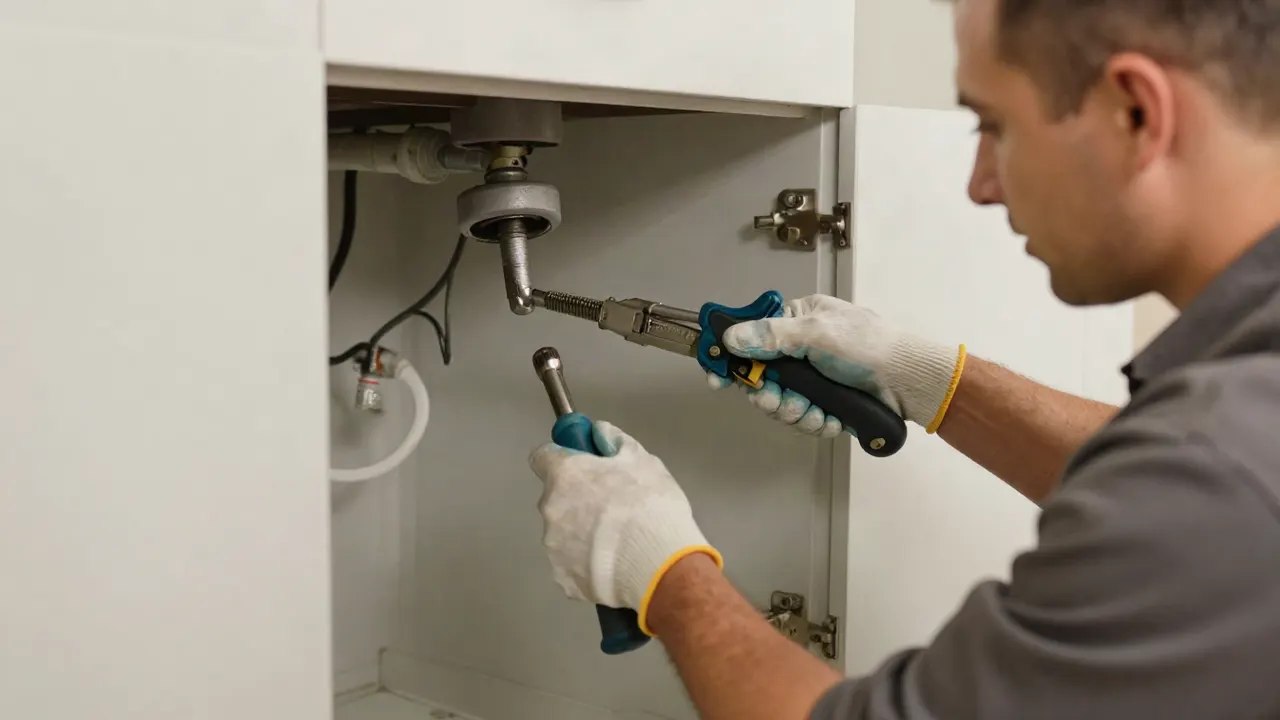
Loosen the nut at the faucet tailpiece first. Hold the shutoff valve body steady with one wrench while you turn the supply nut with the other. This is the single most important habit in the whole job: never let torque travel into the wall.
4. Remove the old faucet from above
Once the lines are free, the mounting nuts come off with the basin wrench. If the old faucet has a corroded base, work a plastic scraper under it rather than prying with a screwdriver - you don't want to gouge the countertop or bend the sink flange.
5. Clean the deck and check the supply stubs
Wipe the mounting surface and look at the pipe stubs coming out of the wall. Green crust on copper means a slow seep that's been running for years. That's a leak detection issue, not a faucet issue, and it's worth a look before you cover it up.
6. Set the new faucet and hand-tighten the mounts
Feed the supply lines through the deck hole first, then seat the faucet. Tighten mounting nuts to snug plus a quarter turn. Over-tightening cracks porcelain sinks and deforms the gasket.
7. Connect new supply lines to the shutoffs
Use new braided lines every time - they're $8 to $14 each and they eliminate the most common failure point. Hand-tighten, then a quarter turn with the wrench. Thread tape goes on the pipe threads, not on compression fittings.
8. Turn the water on slowly and watch for 10 minutes
Open the shutoff a quarter turn, check for drips, then open fully. Run both hot and cold for two minutes and dry every connection with a paper towel. A single drop on the towel means re-seat the fitting now, not later.
If you'd rather not spend a Saturday under the cabinet, our team handles faucet installation southlake TX in about 90 minutes including haul-away of the old fixture.
How much does faucet installation cost in Southlake?
Typical 2026 pricing in this area runs $180 to $320 for a standard kitchen or bathroom faucet swap when you supply the fixture, and $320 to $550 when we supply a mid-grade faucet and handle disposal. That's labor, new supply lines, and thread tape.
What moves the number:
- Shutoff valve replacement - add $60 to $120 for a pair of quarter-turn ball valves
- Corroded or seized connections - add $80 to $200 if we have to cut and re-sweat a stub
- Undermount sink resealing - add $75 to $150
- Garbage disposal reconnection - add $50 to $90 if the disposal has to come off to reach the faucet
A DIY install costs you the faucet plus $40 to $80 in tools and supplies, assuming nothing breaks. The math flips the moment a shutoff valve fails, because a cabinet flood typically runs $2,000 to $8,000 in water damage once it reaches the floor and the cabinet base.
We quote the job before we start and you approve the number before we open a tool bag. No surprise line items.
Common mistakes that turn a faucet swap into a pipe repair
The mistakes that cause damage are almost always torque and old parts, not technique. Here's what we see on repair calls after a homeowner install.
- Turning a stiff shutoff valve with force. If it doesn't move with moderate pressure, stop and shut off at the main. Forcing it cracks the valve body.
- Reusing old supply lines. A $10 braided line is not worth a $3,000 floor repair. Replace them every time.
- Letting the wrench twist the pipe stub. Always counter-hold the valve body. Torque into the wall is how solder joints fail.
- Over-tightening compression fittings. Snug plus a quarter turn. More than that crushes the ferrule and creates the leak you were trying to prevent.
- Thread tape on the wrong threads. Tape goes on tapered pipe threads, never on compression or flare fittings.
- Not testing under pressure before closing the cabinet. Run water for two full minutes and dry-check every joint.
- Ignoring green crust or white scale on the stub. That's an existing leak, and covering it with a new faucet just hides it.
If you find active corrosion on the stub or a valve that won't seal, that's the point to stop. Our leak repair southlake TX team can pressure-test the line and fix the connection before the new faucet goes on, which is far cheaper than discovering it after a cabinet floods.
When to call a professional
Call a licensed plumber when the shutoff valves don't close cleanly, when you see corrosion or green crust on the supply stubs, when the faucet sits on a stone countertop you can't risk chipping, or when the sink is an undermount that has to be resealed. Those four situations account for nearly every faucet job that goes wrong.
We also get calls for faucets mounted on a sink installation southlake TX where the deck hole was drilled slightly off-center - the faucet won't seat flat and no amount of tightening fixes it. That's a 20-minute correction with the right tool and an hour of frustration without it.
Southlake Oakline Plumbing handles faucet installs, valve replacements, and the pipe work underneath as one job. We're a state-licensed plumbing contractor, we carry the parts on the truck, and we test every connection under full pressure before we leave your kitchen.
Frequently Asked Questions
How do I install a new faucet without damaging pipes in Southlake?
Shut off both angle stops, drain the lines, and counter-hold the valve body with one wrench while you loosen the supply nut with the other. Use new braided supply lines and tighten fittings to snug plus a quarter turn. Never force a seized shutoff valve - that's the single most common cause of damage.
Can I install a faucet myself in Southlake TX?
Yes, if your shutoff valves close cleanly and the supply stubs are corrosion-free. A standard swap takes a homeowner two to three hours. If the valves are original to a pre-2000 home or won't seal, hire a plumber - the risk of a cabinet flood outweighs the savings.
What tools do I need to install a faucet in Southlake?
A basin wrench, a 10-inch adjustable wrench, PTFE thread tape, a bucket and rags, a headlamp, and two new braided supply lines. Add penetrating oil for stiff valves. Total tool cost runs $40 to $80 if you're starting from nothing, and the basin wrench is the one you can't substitute.
How much does faucet installation cost in Southlake?
In 2026, expect $180 to $320 for labor on a standard swap if you supply the faucet, or $320 to $550 with a mid-grade fixture included. Add $60 to $120 if the shutoff valves need replacing, and $80 to $200 if a corroded stub has to be cut and re-sweated.
How long does a faucet installation take?
A straightforward kitchen or bathroom faucet takes 90 minutes to two hours for a plumber, or two to three hours for a careful DIY install. Add 30 to 45 minutes if the shutoff valves are being replaced, and another 30 if a corroded connection needs repair.
Get help with plumbing in Southlake
If your shutoff valves are stiff, your supply stubs show corrosion, or you'd simply rather not spend the afternoon on your back under the cabinet, we'll take it from here. We install the faucet, replace what needs replacing, and pressure-test every connection before we pack up.
Call Southlake Oakline Plumbing at (682) 470-5111 to schedule your faucet installation.